How to set the SED key into the device instruction#
Environment:
RAID Model: All Supreme RAID model
Host Hardware: AMD/Intel
Operating System: Linux/Windows
SupremeRAID driver: 1.3.x - later version
Description

Resolution
Linux
[After 1.6.1]
Support for Configuring SED Keys During Physical Drive Creation
Users can now configure Self-Encrypting Drive (SED) keys directly when creating physical drives, eliminating the need for third-party tools to lock the drive beforehand. To take ownership of a physical drive with SED support (if the drive is not yet locked), use the --sed-take-ownership option. This command will prompt for confirmation, a new SED key, and any required credentials.
Note: This process will erase all user data on the drive.
$ sudo graidctl create physical_drive /dev/nvme1 --sed-take-ownership
To bypass prompts, you can use the following options:
$ sudo graidctl create physical_drive /dev/nvme1 --sed-take-ownership --new-sed-key [New Password] --no-current-sid --confirm-to-erase
$ sudo graidctl create physical_drive /dev/nvme1 --sed-take-ownership --new-sed-key [New Password] --current-sid [Original Password] --confirm-to-erase
$ sudo graidctl create physical_drive /dev/nvme1 --sed-take-ownership --new-sed-key [New Password] --psid [PSID] --confirm-to-erase
Note: During ownership, both the SID and admin1 key will be set to the same value (the SED key), and only this SED key will be stored in the system.
#
[Before 1.6.1]
SEDutil
Example:
[enable sed key]
sedutil-cli -n --setLockingRange 0 lk <%your password%> <dev path>
SEDcli
- APT base: libssl-devel, libkmip
- YUM/DNF base: openssl-devel, libkmip
- Install the openssl lib
[APT]apt install libssl-devel[YUM/DNF]
yum install openssl-devel
tar xvf sedcli_1_2.tar.gz
cd sedcli-sedcli_1_2/src
chmod +x ./configure
./configure
make all
make install
sudo sedcli --discovery -d <dev path>
# Factory reset with PSID
sudo sedcli --revert -d <dev path> -a 00-00-00-09-00-01-ff-01
-> enter the PSID
# Set SID
sudo sedcli --ownership -d <dev path>
# Activate the Locking SP
sudo sedcli --activate-sp -d <dev path> -p <%your password%> -a 00-00-00-09-00-00-00-06
# Set up global locking range
sudo sedcli --setup-global-range -d <dev path> -r enabled -w enabled
sudo sedcli --lock-unlock -d <dev path> -a 00-00-00-09-00-01-00-01 -t LK
# Unlock
sudo sedcli --lock-unlock -d <dev path> -a 00-00-00-09-00-01-00-01 -t RW
# Deactive the Locking SP
sudo sedcli --revert-lsp -d <dev path> -a 00-00-00-09-00-01-00-01
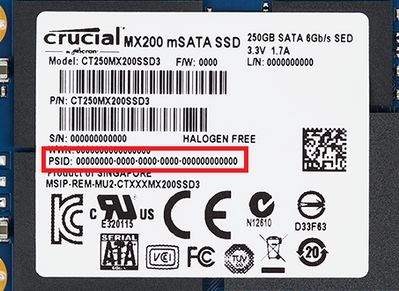
P.S. the <%PSID%> usually prints on the device label; it can't query by the system.
SEDscript
Windows
- Navigate to the SEDutil GitHub Releases page.
- Find the latest Windows executable, e.g., https://github.com/ChubbyAnt/sedutil/releases/download/1.15-5ad84d8/sedutil-cli.exe-1.15-5ad84d8.zip (version numbers may vary; choose the most recent).
- Click the file name to download the zip file containing the Windows version of SEDutil.
Setup Steps
- Extract the Zip File:
- Unzip the downloaded file to a directory, such as C:\sedutil.
- Locate the sedutil-cli.exe file in the extracted folder.
- Open Command Prompt as Administrator:
- Right-click the Start menu and select "Command Prompt (Admin)" or "Windows PowerShell (Admin)" to open an elevated terminal.
- Administrative privileges are required for SEDutil to access drive hardware features.
- Navigate to the SEDutil Directory:
- In the command prompt, change to the directory where SEDutil is located:
cd C:\sedutil
- In the command prompt, change to the directory where SEDutil is located:
- Identify the Physical Drive Number:
- Use the diskpart utility to determine the device path for your SED:
- Type diskpart and press Enter.
- At the DISKPART> prompt, type list disk and press Enter.
- Note the disk number of your target drive (e.g., Disk 0, Disk 1).
- Type exit to close diskpart.
- SEDutil uses the device path format \\.\PhysicalDriveX, where X is the disk number (e.g., \\.\PhysicalDrive0 for Disk 0).
- Use the diskpart utility to determine the device path for your SED:
SEDutil Commands for Windows
Below are key SEDutil commands for Windows. Replace <PSID> with the Physical Security ID printed on your drive’s label (it cannot be retrieved programmatically), <your_password> with your chosen password, and use the correct device path (e.g., \\.\PhysicalDrive#) based on the disk number identified earlier.
1. Erase All Data Using PSID
- Command:
sedutil-cli.exe --yesIreallywanttoERASEALLmydatausingthePSID <PSID> \\.\PhysicalDrive# - Purpose: Resets the drive to factory state by erasing all data using the PSID.
- Warning: This action is irreversible and wipes all data on the drive.
2. Initial Setup with Password
- Command:
sedutil-cli.exe --initialSetup <your_password> \\.\PhysicalDrive# - Purpose: Sets an initial password for the drive.
- Note: Use a strong password. Refer to SEDutil documentation for multi-password configurations.
3. Enable Locking Range
- Command:
sedutil-cli.exe --enableLockingRange 0 <your_password> \\.\PhysicalDrive# - Purpose: Activates the locking feature for range 0 on the drive.
4. Set Locking Range to Lock
- Command:
sedutil-cli.exe --setLockingRange 0 lk <your_password> \\.\PhysicalDrive# - Purpose: Locks range 0 on the drive using the specified password.
5. Unlock the Drive
- Command:
sedutil-cli.exe --setLockingRange 0 rw <your_password> \\.\PhysicalDrive# - Purpose: Unlocks range 0 on the drive using the specified password.
6. Disable Locking Range
- Command:
sedutil-cli.exe --disableLockingRange 0 <your_password> \\.\PhysicalDrive# - Purpose: Deactivates the locking feature for range 0.
7. Revert to Factory State Without Erasing Data
- Command:
sedutil-cli.exe --revertNoErase <your_password> \\.\PhysicalDrive# Purpose: Reverts the drive to factory state without erasing data.
Complete Example
Assume you have:
- Extracted SEDutil to C:\sedutil.
- Identified your SED as Disk 0.
- Found the PSID on the drive label as ABC123....
- Chosen the password MySecurePass123.
Run these commands in sequence:
cd C:\sedutil
sedutil-cli.exe --yesIreallywanttoERASEALLmydatausingthePSID ABC123... \\.\PhysicalDrive0
sedutil-cli.exe --initialSetup MySecurePass123 \\.\PhysicalDrive0
sedutil-cli.exe --enableLockingRange 0 MySecurePass123 \\.\PhysicalDrive0
sedutil-cli.exe --setLockingRange 0 lk MySecurePass123 \\.\PhysicalDrive0
To unlock the drive:
sedutil-cli.exe --setLockingRange 0 rw MySecurePass123 \\.\PhysicalDrive0
To disable the locking range:
sedutil-cli.exe --disableLockingRange 0 MySecurePass123 \\.\PhysicalDrive0
To revert without erasing data:
sedutil-cli.exe --revertNoErase MySecurePass123 \\.\PhysicalDrive0
Related Articles
Setting up the dual-controller to enable High Availability (HA) and auto-failover feature.#
Environment RAID Model: All Supreme RAID model Host Hardware: AMD/Intel Operating System: Linux SupremeRAID driver: 1.3.x or later Description This feature enables the SupremeRAID system to automatically fail over to another SupremeRAID card when one ...[Linux] Controller Shows "MISSING" After License Application#
Environment RAID Models: SupremeRAID SR-1000, SR-1010, SR-1001 Host Hardware: Any Operating System: Linux Issue On certain Linux systems, after applying the SupremeRAID license, the controller may be reported as "MISSING" in the output of graidctl or ...License Un-Binds from Graid Card After a Hard Power Event in Windows#
Environment RAID Model: SR-1000, SR-1001, SR-1010 Host Hardware: AMD, Intel Operating Systems: Microsoft Windows Issue After successful application of the SupremeRAID license key, then a system power down event, the license can lose its bonding with ...[Windows][GUI] How to create a Microsoft loopback adapter#
Environment RAID Model: SR1000 or SR1010, SR1001 Host Hardware: Any Operating System: Windows Issue When no active network connection is available, the Graid Management GUI (MGR) may fail to display properly in Windows. This is because the GUI ...Management
RAID Components There are three major RAID logical components in SupremeRAID™, the Physical Drive (PD) , the Drive Group (DG) , and the Virtual Drive (VD) . Physical Drive (PD) Since NVMe drives are not directly attached to the SupremeRAID™ ...